Breakout – Free Online Game

Breakout – Free Online Game

Play Breakout online for free! Control the paddle, bounce the ball and smash through rows of bricks. Test your reflexes, clear the playing field and aim for a high score. No downloads or registration required.

Breakout

Bounce the ball and clear every brick.

Score0
Best0
Level1
Ready to play? Press Start when you are ready.

Use your keyboard or the on-screen controls.

# How to Play Breakout

Breakout is a classic arcade game where you control a paddle at the bottom of the screen. Your goal is to bounce a ball against the bricks above and clear as many of them as possible without letting the ball fall past your paddle.

## Controls

– **Left Arrow:** Move the paddle left.
– **Right Arrow:** Move the paddle right.
– **Mouse:** Move the paddle horizontally, if supported by the game.
– **Start:** Begin a new game.
– **Pause:** Pause or resume the game.
– **Restart:** Start a new round.

## Step-by-Step Tutorial

**Step 1: Start the Game**

Open Breakout and press Start to begin. The ball will start moving across the playing field.

**Step 2: Move the Paddle**

Use the left and right arrow keys to move the paddle. Keep it underneath the ball so you can bounce it back into the bricks.

**Step 3: Break the Bricks**

Every time the ball hits a brick, the brick disappears and you earn points. Keep returning the ball towards the remaining bricks.

**Step 4: Keep the Ball in Play**

Watch the ball carefully and move the paddle into position before it reaches the bottom of the screen. If you miss the ball, you lose a life.

**Step 5: Clear the Playing Field**

Continue breaking bricks and try to clear the entire wall. Aim for the highest score possible.

## Tips for Playing Breakout

– Watch the ball instead of focusing only on the bricks.
– Move the paddle early to avoid missing the ball.
– Try to send the ball towards areas with many remaining bricks.
– Keep track of the ball when it bounces off the walls.

## Free Online Game

Breakout runs directly in your browser. No downloads, installation, registration or subscription are required.
Snake – Free Online Game

Snake – Free Online Game

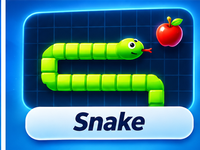
Play the classic Snake game online for free! Collect food, grow your snake and avoid hitting the walls or your own tail. Challenge yourself to beat your high score in this fun browser-based arcade game. No downloads or registration required.

Snake

Guide the snake, collect food and beat your high score.

Score0
Best0
Level1
Ready to play? Press Start when you are ready.

Use your keyboard or the on-screen controls.

# How to Play Snake

Snake is a classic arcade game where you control a growing snake. Your goal is to collect as much food as possible, increase your score, and avoid crashing into the walls or your own tail.

## Controls

– **Arrow Keys:** Move the snake up, down, left or right.
– **W, A, S, D:** Alternative movement controls.
– **Start:** Begin a new game.
– **Pause:** Pause or resume the game.
– **Restart:** Start over and try to beat your previous score.

## Step-by-Step Tutorial

**Step 1: Start the Game**

Open Snake and press the Start button to begin. The snake will start moving across the playing field.

**Step 2: Control the Snake**

Use the arrow keys or WASD keys to change direction. Guide the snake towards the food appearing on the screen.

**Step 3: Collect Food**

Each piece of food makes the snake longer and increases your score. As the snake grows, it becomes more difficult to navigate the playing field.

**Step 4: Avoid Crashing**

Avoid hitting the walls or running into your own tail. Plan your turns carefully and leave enough room to move.

**Step 5: Beat Your High Score**

Keep collecting food for as long as possible. When the game ends, restart and see if you can beat your previous best score.

## Tips for Playing Snake

– Plan your next turn before reaching a corner.
– Avoid making unnecessary sharp turns.
– Keep as much open space around the snake as possible.
– Stay calm as the snake gets longer.

## Free Online Game

Snake runs directly in your browser. No downloads, installation, registration or subscription are required.
Tetris – Free Online Game

Tetris – Free Online Game

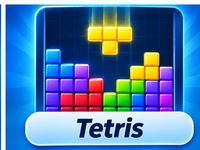
Play Tetris online for free! Rotate and arrange falling blocks to complete horizontal lines and keep the board clear. Challenge your puzzle skills and see how high you can score. No downloads or registration required.

Tetris

Fit falling blocks together and clear complete lines.

Score0
Best0
Level1
Ready to play? Press Start when you are ready.

Use your keyboard or the on-screen controls.

# How to Play Tetris

Tetris is a classic puzzle game where you arrange falling blocks to create complete horizontal lines. Your goal is to clear as many lines as possible and prevent the blocks from reaching the top of the playing field.

## Controls

– **Left Arrow:** Move the block left.
– **Right Arrow:** Move the block right.
– **Down Arrow:** Move the block down faster.
– **Up Arrow:** Rotate the block.
– **Space:** Drop the block quickly.
– **Start:** Begin a new game.
– **Pause:** Pause or resume the game.
– **Restart:** Start a new game.

## Step-by-Step Tutorial

**Step 1: Start the Game**

Open Tetris and press Start. Blocks will begin falling from the top of the playing field.

**Step 2: Move the Blocks**

Use the arrow keys to move each falling block left or right. Position it where it fits best.

**Step 3: Rotate the Blocks**

Rotate the falling blocks to find the best position. Different shapes fit together in different ways.

**Step 4: Complete Horizontal Lines**

Arrange the blocks so that they form complete horizontal lines. When a line is completely filled, it disappears and you earn points.

**Step 5: Keep the Board Clear**

Continue arranging blocks and clearing lines. If the blocks stack up to the top of the playing field, the game ends.

## Tips for Playing Tetris

– Keep the playing field as flat as possible.
– Avoid leaving empty spaces that are difficult to fill.
– Think about where the next block will fit before placing the current one.
– Try to clear several lines at once for a higher score.

## Free Online Game

Tetris runs directly in your browser. No downloads, installation, registration or subscription are required.
Batch Rename Files

Batch Rename Files

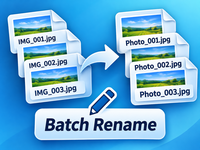
Rename multiple files at once with ease using Batch Rename Files. Add prefixes and suffixes, replace text with Regex, change letter case, and number files automatically. Preview every change before downloading your renamed files individually or as a ZIP. Free, secure and 100% browser-based.

Batch Rename Files

Rename multiple files at once. Everything is processed locally in your browser. Your original files are never changed.

  1. 1Select Files
  2. 2Rename Settings
  3. 3Preview & Download

1. Select Files

Drag & drop files here or click to browse
No files selected.


How to Use Batch Rename Files

Batch Rename Files makes it easy to rename multiple files at once directly in your browser. Follow these steps to get started.

Step 1: Select Your Files

  1. Open the Batch Rename Files tool.
  2. Drag and drop your files into the selection area, or click to browse.
  3. You can also select an entire folder.
  4. Review the selected files in the file list.
  5. Remove individual files if needed.

Step 2: Choose Your Rename Settings

Select one of the three renaming modes.

Option A: Pattern

Use this mode to add prefixes, suffixes and sequential numbers.

  1. Enter a prefix if you want text before each filename.
  2. Enter a suffix if you want text after each filename.
  3. Choose your numbering format.
  4. Set the starting number.
  5. Choose whether to keep the original file extension.

Example:

  • Original: photo.jpg
  • New name: 001.jpg

Option B: Regex Find / Replace

Use this mode to find and replace text in filenames.

  1. Enter the text or regular expression you want to find.
  2. Enter the replacement text.
  3. Apply the settings and review the new filenames.

This is useful for removing unwanted text, replacing characters or changing recurring parts of filenames.

Option C: Case Transform

Use this mode to change capitalization.

Available transformations include:

  • Lowercase
  • UPPERCASE
  • Capitalize
  • Title Case

Choose the format you want to apply to your filenames.

Step 3: Preview and Download

  1. Review the preview table.
  2. Compare the original filenames with the new filenames.
  3. Check that the results are correct.
  4. If necessary, return to the settings and make adjustments.
  5. Download individual renamed files or create a ZIP archive containing all your files.

That’s It!

Your files are renamed and ready to use.

Private and Secure

Batch Rename Files processes everything locally in your browser. Your files are not uploaded to our servers, and your original files on your computer remain unchanged.

No installation, no registration and no downloads required to use the tool. Just open it and start renaming!

ZIP File Creator

ZIP File Creator

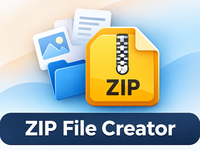
Create ZIP files quickly and easily in your browser. Select individual files or entire folders, organize your selection, choose the compression level, and download everything as one ZIP file. Your files stay on your device and are never uploaded.

ZIP File Creator

Create a ZIP archive from files and folders. Everything is processed locally in your browser.

Drop files or folders here or choose files and folders below
No files selected.


How to Use ZIP File Creator

ZIP File Creator lets you combine multiple files and entire folders into a single ZIP archive directly in your browser. No software installation or file uploads required.

Step 1: Select Your Files

  1. Open the ZIP File Creator tool.
  2. Drag and drop files into the selection area, or click to browse.
  3. To add an entire folder, use the Choose Folder option.
  4. Selected files will appear in the file list.
  5. Review the list and remove individual files if needed.

You can select files from different folders and combine them into one ZIP archive.

Step 2: Configure Your ZIP Archive

Before creating your archive, adjust the settings:

  1. ZIP File Name: Enter the name you want for your ZIP archive. The default name is archive.
  2. Compression Level: Choose how much compression to apply.

Available options:

  • No compression: Fastest option, with larger ZIP files.
  • Fast: Prioritizes speed.
  • Low: Light compression.
  • Standard: A good balance between speed and file size.
  • Maximum: Smaller archive size, but takes longer to create.

Step 3: Create and Download Your ZIP

  1. Click Create ZIP.
  2. Wait while the files are processed.
  3. Follow the progress indicator.
  4. When the archive is ready, download your ZIP file.

Your ZIP archive is now ready to store, share or transfer.

Need to Start Over?

Click Clear Files to remove all selected files and start again.

Private and Secure

ZIP File Creator processes your files locally in your browser. Your files are not uploaded to our servers.

No installation, no registration and no subscription required. Just select your files, create your archive and download it!

Social Media Post Creator

Social Media Post Creator

Create eye-catching social media graphics with custom images, text, fonts and colors. Design posts for Instagram, Facebook, TikTok and Pinterest, then download your creations.

Social Media Post Creator

Create a graphic for social media. Your images are processed in your browser and are never uploaded.

1. Choose a format

2. Add an image

JPG, PNG or WebP. The original image is not changed.

3. Add your text

4. Background and download

Live preview 1080 × 1080 px

The preview is scaled to fit this area. The downloaded image uses the full selected dimensions.


How to Use the Social Media Post Creator

Create eye-catching graphics for social media with the free DesktopGoodies Post Creator. Add your own images, choose fonts and colors, position your text, and download your finished design.

Everything is processed directly in your browser. Your images are never uploaded to our server.

1. Choose a format

Start by selecting the format you want to create.

Available formats:

  • Instagram / Facebook Post: 1080 × 1080 px
  • Portrait Post: 1080 × 1350 px
  • Story / Reel: 1080 × 1920 px
  • TikTok Post: 1080 × 1920 px
  • Landscape Post: 1200 × 630 px
  • Pinterest Pin: 1000 × 1500 px

The preview automatically adjusts to your selected format.

2. Add an image

Click Choose image and select a picture from your computer.

Supported formats:

  • JPG
  • PNG
  • WebP

Your image is fitted to the selected canvas. The original image remains unchanged.

3. Add your text

Enter your message in the text field. You can then customize its appearance.

Font: Choose from a selection of Google Fonts and classic system fonts, including modern, elegant, bold and handwritten styles.

Text size: Adjust the font size to suit your design.

Text color: Select any color using the color picker.

Text alignment: Choose left, center or right alignment.

Text position: Place your text at the top, center or bottom of the image.

Text shadow: Enable the shadow option to make text easier to read against busy backgrounds.

4. Choose a background color

If you are creating a design without an image, select a background color.

This is useful for simple announcements, quotes, promotional graphics and text-based social media posts.

5. Preview your design

The Live Preview shows how your design will look.

Changes to the format, image, text, fonts and colors are reflected in the preview.

The displayed dimensions show the actual output size in pixels.

6. Download your design

Choose your preferred image format:

  • PNG: Great for graphics and text.
  • JPG: Suitable for photographs and smaller file sizes.

If you select JPG, you can also choose the image quality.

Click Download design to save your finished graphic to your computer.

Tips for better social media graphics

  • Keep text short and easy to read.
  • Use strong contrast between text and background.
  • Avoid placing important text too close to the edges.
  • Choose fonts that match the mood of your message.
  • Use the correct format for each social media platform.

Free, private and easy to use

The DesktopGoodies Post Creator works directly in your browser. No account, software installation or image upload is required.

Create your design, download it and share it with the world!

Image Crop

Image Crop

Crop images to exact pixel dimensions. Choose popular formats such as TikTok, Instagram and YouTube, or enter your own custom size.

Image Crop

Upload an image, position the crop area and download your result. Your image stays on your device.


How to Use Image Crop

Image Crop lets you crop images online to the exact size and proportions you need. Create images for websites, social media, profile pictures and more, directly in your browser.

Step 1: Upload Your Image

  1. Open the Image Crop tool.
  2. Select an image from your computer.
  3. Wait for the image to appear in the editing area.

Your image is processed locally in your browser. It is not uploaded to our servers.

Step 2: Select Your Crop Area

  1. Use the crop selection frame to mark the area you want to keep.
  2. Drag the frame to move the selection.
  3. Drag the corner handles to resize the selection.
  4. Adjust the frame until you are happy with the result.

Only the area inside the selection frame will be included in your cropped image.

Step 3: Choose Your Image Size and Format

  1. Select your preferred output dimensions.
  2. Choose the aspect ratio or enter custom pixel dimensions when available.
  3. Select the output image format.
  4. Review your crop before downloading.

You can use custom dimensions for specific purposes, such as social media posts, profile pictures or website graphics.

Step 4: Crop and Download

  1. Check that the selected area looks correct.
  2. Click the crop or download button.
  3. Save your finished image to your computer.

Your cropped image is now ready to use!

Private and Secure

Image Crop processes your image locally in your browser. Your original image remains unchanged, and your files are not uploaded to our servers.

No installation, no registration and no subscription required. Just upload, crop and download!

Batch Resize Images

Batch Resize Images

Resize multiple images at once. Set exact pixel dimensions or scale by percentage, maintain aspect ratio and download your images in JPG, PNG or WebP

Batch Resize Images

Resize several images at once. Your images stay on your device and are not uploaded.

How to Resize Images

Resize multiple images at once with DesktopGoodies Batch Resize. Adjust image dimensions, scale by percentage, and download your processed images in seconds.

1. Upload your images

Click Choose Files and select one or more JPG, PNG or WebP images. You can select several images at once.

2. Choose your resize method

You can resize images in two ways:

  • Dimensions (px): Enter your desired maximum width and height in pixels.
  • Percentage: Scale images by a percentage. Use 50% to reduce their size by half or 150% to enlarge them.

3. Adjust the settings

  • Keep aspect ratio: Maintains the original proportions of your images.
  • Allow enlargement: Allows smaller images to be enlarged when using pixel dimensions.
  • Output format: Choose JPG, PNG or WebP.

4. Process your images

Click Resize Images to start processing. Your images are processed directly in your browser. Original files remain unchanged.

5. Download your results

For up to five images, download each image individually. If you process more than five images, you can download them together in one ZIP file.

That’s it! Your resized images are ready to use.