Social Media Post Creator
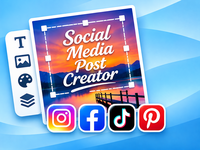
Create eye-catching social media graphics with custom images, text, fonts and colors. Design posts for Instagram, Facebook, TikTok and Pinterest, then download your creations.
Create a graphic for social media. Your images are processed in your browser and are never uploaded. JPG, PNG or WebP. The original image is not changed. The preview is scaled to fit this area. The downloaded image uses the full selected dimensions.Social Media Post Creator
1. Choose a format
2. Add an image
3. Add your text
4. Background and download
How to Use the Social Media Post Creator
Create eye-catching graphics for social media with the free DesktopGoodies Post Creator. Add your own images, choose fonts and colors, position your text, and download your finished design.
Everything is processed directly in your browser. Your images are never uploaded to our server.
1. Choose a format
Start by selecting the format you want to create.
Available formats:
- Instagram / Facebook Post: 1080 × 1080 px
- Portrait Post: 1080 × 1350 px
- Story / Reel: 1080 × 1920 px
- TikTok Post: 1080 × 1920 px
- Landscape Post: 1200 × 630 px
- Pinterest Pin: 1000 × 1500 px
The preview automatically adjusts to your selected format.
2. Add an image
Click Choose image and select a picture from your computer.
Supported formats:
- JPG
- PNG
- WebP
Your image is fitted to the selected canvas. The original image remains unchanged.
3. Add your text
Enter your message in the text field. You can then customize its appearance.
Font: Choose from a selection of Google Fonts and classic system fonts, including modern, elegant, bold and handwritten styles.
Text size: Adjust the font size to suit your design.
Text color: Select any color using the color picker.
Text alignment: Choose left, center or right alignment.
Text position: Place your text at the top, center or bottom of the image.
Text shadow: Enable the shadow option to make text easier to read against busy backgrounds.
4. Choose a background color
If you are creating a design without an image, select a background color.
This is useful for simple announcements, quotes, promotional graphics and text-based social media posts.
5. Preview your design
The Live Preview shows how your design will look.
Changes to the format, image, text, fonts and colors are reflected in the preview.
The displayed dimensions show the actual output size in pixels.
6. Download your design
Choose your preferred image format:
- PNG: Great for graphics and text.
- JPG: Suitable for photographs and smaller file sizes.
If you select JPG, you can also choose the image quality.
Click Download design to save your finished graphic to your computer.
Tips for better social media graphics
- Keep text short and easy to read.
- Use strong contrast between text and background.
- Avoid placing important text too close to the edges.
- Choose fonts that match the mood of your message.
- Use the correct format for each social media platform.
Free, private and easy to use
The DesktopGoodies Post Creator works directly in your browser. No account, software installation or image upload is required.
Create your design, download it and share it with the world!