Image to Text (OCR)

Image to Text (OCR)

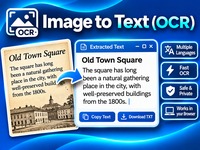
Extract text from images with Image to Text (OCR). Convert printed text in photos, screenshots and scanned documents into editable text. Supports multiple languages, including: English, Swedish, Arabic and Chinese and more. Copy or download the extracted text, with processing directly in your browser.

Tutorial

1. Upload an image

Click Choose Image and select a photo, screenshot or scanned document containing text. Supported image formats include JPG, PNG, WebP, BMP and TIFF.

2. Select the recognition language

Choose how the OCR tool should recognize the text:

  • Automatic: Uses your browser’s language setting to select the OCR language.

  • Manual selection: Choose the actual language in your image from the language list. For example, select Russian if your image contains Russian text, even if your browser is set to English.

Important: Automatic does not detect the language directly from the image. For the best results, select the correct language manually when you know it.

3. Extract the text

Click Extract Text to start the recognition process. A progress indicator shows how the OCR engine is processing your image.

4. Review the result

When processing is complete, the recognized text appears in the text field. Read through it and correct any recognition errors if necessary.

5. Copy the extracted text

Click Copy Text to copy the result to your clipboard. You can then paste it into a document, email or other application.

6. Download as a text file

Click Download TXT to save the extracted text as a .txt file on your computer.

Tips for better results

  • Use clear, sharp images with good lighting.

  • Make sure the text is not too small or blurry.

  • Avoid tilted images whenever possible.

  • Select the correct language manually for better recognition accuracy.

  • Handwritten text may not be recognized as accurately as printed text.

Blur Image

Blur Image

Blur Image lets you protect sensitive details in photos with blur, pixelation or solid black masking. Select an area or paint directly onto your image, add custom CENSORED labels, and download the edited result. Simple, private and processed directly in your browser.


Tutorial: How to Blur an Image

  1. Open Blur Image and upload your picture.

  2. Choose the Brush or Area Selection tool.

  3. Select an effect: Blur, Pixelate or Black Mask.

  4. Adjust the brush size or selection area.

  5. Apply the effect to hide faces, text, license plates or other details.

  6. Add a CENSORED label if needed. Customize its text, color and rotation.

  7. Use Undo or Redo to adjust your edits.

  8. Choose PNG, JPG or WebP and download your image.

Merge Images

Merge Images

Combine multiple images into one with Merge Images. Arrange pictures horizontally, vertically or in a grid, adjust spacing and background color, choose the output format, and download your finished image. Free, simple and processed directly in your browser.

Merge Images

Combine photos side by side, stack them vertically or create a grid. Your images stay in your browser.

Layout settings

Selected images (0)

No images selected yet.

Privacy: Images are combined locally in your browser. Nothing is uploaded to our server.

Tutorial: How to Merge Images

  1. Open Merge Images and upload the pictures you want to combine.

  2. Drag and drop images into the desired order.

  3. Choose a layout: Horizontal, Vertical or Grid.

  4. Adjust the grid columns, image dimensions, spacing and background color.

  5. Select the output format: PNG, JPG or WebP.

  6. Click Preview to see the result.

  7. Click Download to save your merged image.

JSON Formatter

Online JSON Formatter

Format, validate and simplify JSON data with our free online JSON Formatter. Beautify messy JSON, compress data with Minify, sort object keys and quickly identify syntax errors. No installation or registration required. Everything runs directly in your browser.

Ready. Paste JSON or open a .json file.
Lines: 1 Characters: 2 Size: 2 B

Your data stays in your browser. Nothing is uploaded or stored.

How to Use the JSON Formatter

  1. Enter your JSON: Paste your JSON code into the input editor or open a .json file from your computer.

  2. Choose indentation: Select your preferred indentation using 2 spaces, 4 spaces or tabs.

  3. Format JSON: Click Format JSON to organize your data into a clean, readable structure.

  4. Minify JSON: Use Minify JSON to remove unnecessary spaces and line breaks.

  5. Validate JSON: Click Validate to check your code for syntax errors.

  6. Sort keys: Optionally sort object keys alphabetically.

  7. Copy or download: Copy the formatted result or save it as a JSON file.

Tip: If your JSON contains an error, check for missing commas, quotation marks or closing brackets.

QR Code Generator

QR Code Generator

Create custom QR codes in seconds with our free online QR Code Generator. Generate codes for websites, text, WiFi networks, email, phone numbers and contacts. Customize colors, choose your preferred size and download your QR codes as PNG or SVG files.

Customize your QR code

Live preview

Your QR code will appear here

Your QR code is generated in your browser. No data is uploaded or stored.

How to Use the QR Code Generator

  1. Choose a QR code type: Select Website URL, Text, WiFi, Email, Phone, SMS or Contact.

  2. Enter your information: Add the website address, text or other required details.

  3. Customize your QR code: Choose foreground and background colors.

  4. Adjust the settings: Select the output size and error correction level.

  5. Add a logo: Optionally upload your own logo to display in the center.

  6. Preview your QR code: Check the result before downloading.

  7. Download: Save your QR code as a PNG or SVG file.

Tip: Always test your QR code with a phone before printing or sharing it. Use good contrast between the code and background for reliable scanning.

Favicon Generator

Favicon Generator

Create professional favicons for your website in seconds! Upload an image or design your own icon using text, colors and shapes. Generate all essential favicon sizes and download a complete package ready for your website.

PNG, JPG, WebP or SVG. A square image with a simple, bold design usually works best.

Live preview

Browser tab
Your website
16 × 16
32 × 32
180 × 180

Your design is previewed at common favicon sizes. Fine details may disappear at 16 × 16 pixels.


Tutorial

How to Use the Favicon Generator

  1. Choose your source: Upload an image or create a favicon using text and initials.

  2. Customize your design: Select colors, background shape and image positioning.

  3. Preview your favicon: Check how your icon looks in different sizes.

  4. Generate icons: Create favicon files for browsers, Apple devices and Android devices.

  5. Download your package: Download the ZIP file containing all generated icons, HTML code and manifest files.

  6. Add it to your website: Upload the files to your website and insert the provided HTML code into your page header.

Tip: Use a simple design with clear shapes and strong contrast. Favicons are often displayed at very small sizes.

Batch Rename Files

Batch Rename Files

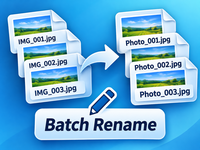
Rename multiple files at once with ease using Batch Rename Files. Add prefixes and suffixes, replace text with Regex, change letter case, and number files automatically. Preview every change before downloading your renamed files individually or as a ZIP. Free, secure and 100% browser-based.

Batch Rename Files

Rename multiple files at once. Everything is processed locally in your browser. Your original files are never changed.

  1. 1Select Files
  2. 2Rename Settings
  3. 3Preview & Download

1. Select Files

Drag & drop files here or click to browse
No files selected.


How to Use Batch Rename Files

Batch Rename Files makes it easy to rename multiple files at once directly in your browser. Follow these steps to get started.

Step 1: Select Your Files

  1. Open the Batch Rename Files tool.
  2. Drag and drop your files into the selection area, or click to browse.
  3. You can also select an entire folder.
  4. Review the selected files in the file list.
  5. Remove individual files if needed.

Step 2: Choose Your Rename Settings

Select one of the three renaming modes.

Option A: Pattern

Use this mode to add prefixes, suffixes and sequential numbers.

  1. Enter a prefix if you want text before each filename.
  2. Enter a suffix if you want text after each filename.
  3. Choose your numbering format.
  4. Set the starting number.
  5. Choose whether to keep the original file extension.

Example:

  • Original: photo.jpg
  • New name: 001.jpg

Option B: Regex Find / Replace

Use this mode to find and replace text in filenames.

  1. Enter the text or regular expression you want to find.
  2. Enter the replacement text.
  3. Apply the settings and review the new filenames.

This is useful for removing unwanted text, replacing characters or changing recurring parts of filenames.

Option C: Case Transform

Use this mode to change capitalization.

Available transformations include:

  • Lowercase
  • UPPERCASE
  • Capitalize
  • Title Case

Choose the format you want to apply to your filenames.

Step 3: Preview and Download

  1. Review the preview table.
  2. Compare the original filenames with the new filenames.
  3. Check that the results are correct.
  4. If necessary, return to the settings and make adjustments.
  5. Download individual renamed files or create a ZIP archive containing all your files.

That’s It!

Your files are renamed and ready to use.

Private and Secure

Batch Rename Files processes everything locally in your browser. Your files are not uploaded to our servers, and your original files on your computer remain unchanged.

No installation, no registration and no downloads required to use the tool. Just open it and start renaming!