
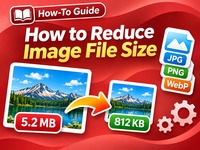
How to Reduce Image File Size
Large image files can slow down your website and make images harder to share. Learn how to reduce image file size by resizing, compressing and choosing the right image format, without making your pictures look noticeably worse. Includes practical tips for preparing images for the web.
How to Reduce Image File Size Without Losing Too Much Quality
Large image files can slow down websites, take up unnecessary storage space and make images difficult to share by email or upload to online services. Fortunately, you can often reduce an image’s file size significantly without a noticeable difference in visual quality.
In this guide, you’ll learn how image compression works, which image formats to use and how to make your images smaller while keeping them looking sharp.
Why Should You Reduce Image File Size?
Large images can cause several problems:
- Slower websites: Large images take longer to download and display.
- More storage space: Smaller files use less space on your computer and server.
- Easier sharing: Compressed images are easier to send by email or upload.
- Better user experience: Faster-loading pages make browsing more pleasant.
Reducing image size is especially useful for website owners, bloggers, online stores and anyone who regularly works with digital images.
1. Choose the Right Image Format
The image format has a major impact on file size. Different formats are designed for different types of images.
- JPG/JPEG: A good choice for photographs and images with many colours. It uses lossy compression to reduce file size.
- PNG: Best suited for graphics, screenshots and images that need transparency. PNG files can be considerably larger than JPG files.
- WebP: A modern format that often produces smaller files than JPG and PNG while maintaining good visual quality.
For most photographs used on websites, WebP or JPG is a sensible choice. Use PNG when you need transparency or when its lossless quality is important.
2. Resize the Image to the Correct Dimensions
One of the easiest ways to reduce file size is to resize the image.
For example, if an image is 4000 pixels wide but will only be displayed at 800 pixels on your website, you may be storing far more image data than necessary.
Consider these approximate dimensions:
| Use | Suggested width |
|---|---|
| Small thumbnail | 300–500 px |
| Blog content image | 800–1200 px |
| Large website image | 1400–1920 px |
| Full-resolution original | Keep separately |
These are guidelines rather than strict rules. The right dimensions depend on the layout and how the image will be displayed.
3. Compress the Image
Image compression reduces the amount of data stored in an image file.
There are two main types:
Lossy compression
This removes some image information to make the file smaller. You can often reduce the file size considerably without noticing much difference at normal viewing sizes. JPG and WebP commonly use lossy compression.
Lossless compression
This reduces file size without discarding image information. It preserves the original image quality, but usually achieves a smaller reduction than lossy compression.
For everyday website photographs, a moderate level of lossy compression is often a good balance between file size and quality.
4. Convert Images to a More Efficient Format
If you have large JPG or PNG files, converting them to WebP may reduce their size.
The result depends on the original image, its dimensions and the compression settings. Always compare the converted image with the original before replacing it.
Keep a copy of the original if you may need to edit or convert it again later.
5. Check the Result Before Using the Image
A smaller file is not automatically a better image. Excessive compression can create visible artefacts, blurry details or rough edges.
Before publishing an image:
- Compare the compressed image with the original.
- Check small details and text.
- Look for visible blocks, blur or colour changes.
- Make sure the image still looks good at its intended display size.
- Check the final file size.
The goal is not to create the smallest possible file. It is to find a good balance between quality and file size.
6. Use an Online Image Compression Tool
You don’t need advanced image-editing software to reduce image file size. An online image compression tool makes the process quick and convenient, without requiring you to install additional programs.
Try Our Free DesktopGoodies Image Compressor
Our free DesktopGoodies Image Compressor makes it easy to reduce the file size of your images. It is a convenient way to optimise pictures before adding them to a website, attaching them to an email or sharing them online.
Simply select an image, adjust the available compression settings and download the optimised result. You can reduce unnecessary file size while keeping an eye on the image quality.
Compress Your Images for Free with DesktopGoodies
Frequently Asked Questions
Does image compression reduce quality?
It depends on the compression method. Lossy compression removes some image information and can reduce quality, while lossless compression preserves the original image information.
What is the best image format for websites?
WebP is often a good choice for website photographs and graphics because it can provide smaller files while maintaining good quality. JPG and PNG are still useful for specific situations.
How much should I compress an image?
There is no single ideal setting for every image. Start with moderate compression and compare the result with the original. Reduce the quality further only if the image still looks good.
Should I resize an image before compressing it?
Yes, if the original dimensions are larger than necessary. Resizing first can make a significant difference because there are fewer pixels to store and compress.
Can I reduce image size without installing software?
Yes. Browser-based image tools let you resize, compress and convert images without installing a program. Check how the tool handles uploaded files if privacy is important to you.
Final Thoughts
Reducing image file size is one of the simplest ways to make websites faster and digital images easier to manage. Start by choosing the right format, resize images to suitable dimensions and apply moderate compression.
Always check the final result before using it. A well-optimised image should load faster without sacrificing the visual quality that matters.